Module 8: Customising TEI, ODD, Roma
5. Selecting and Restricting the TEI Model #
Back to Alice! As we have discussed, our minimal TEI customisation now includes 10 TEI elements, just enough to be able to create TEI-conformant documents. But does this suffice for encoding our Alice example? Not really, since we’re still lacking a bunch of TEI elements to encode the textual phenomena we identified during our document analysis:
- The title page: <titlePage>, <docAuthor>, <byline>, <docImprint>, <publisher>, <docDate>.
- Document structure: <div>, <lg>, <l>.
- Text elements: <emph>, <q>, <pb>, <figure>, <graphic>, <figDesc>, <fw>.
- Semantic units: <name>.
Back to the drawing board of our TEI customisation, back to Roma!
5.1. Selecting Modules and Elements #
In order to encode the textual phenomena we’d identified for our example text, a number of TEI elements have to be included in our TEI customisation. This can be done easily in Roma by ticking the corresponding boxes in the “Elements” tab.
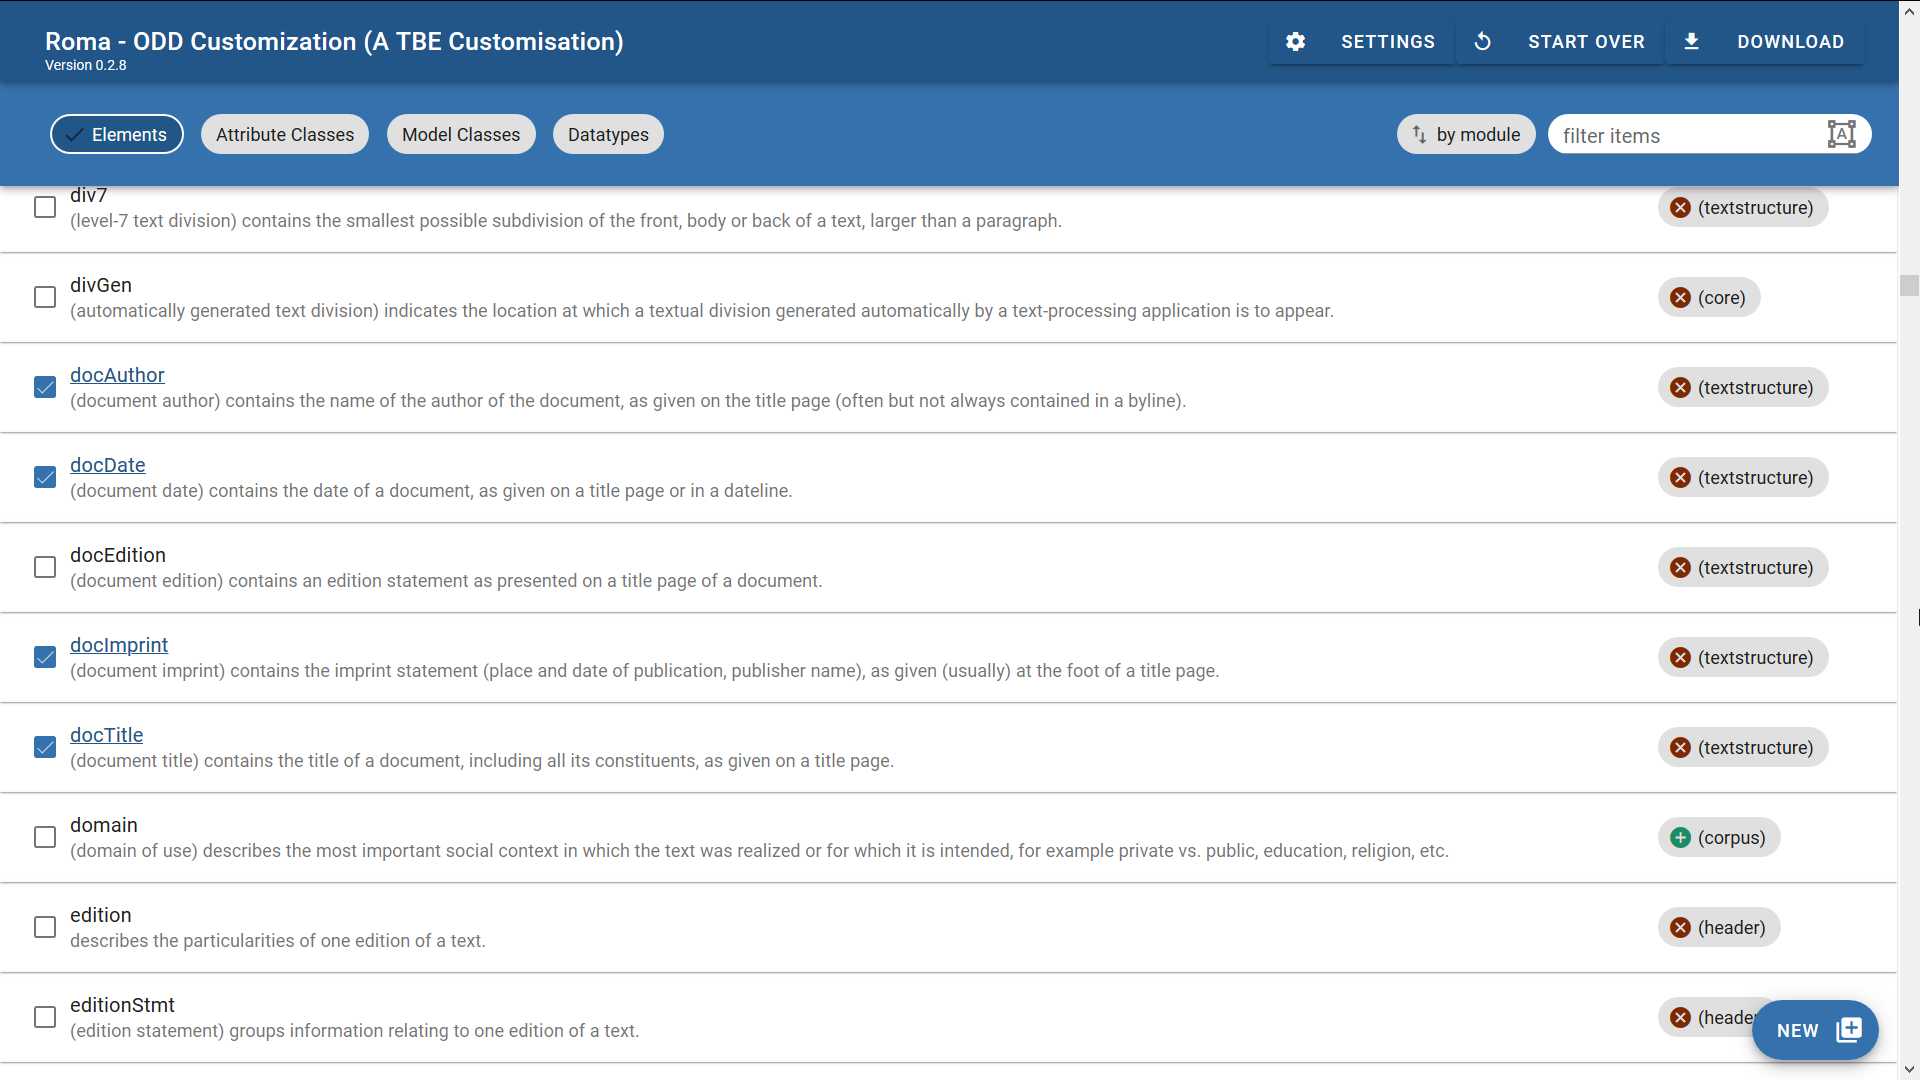
Notice how the right-hand column in Roma informs you for any element which module it belongs to. A convenient way to include or exclude all elements from a module at once, is by selecting or de-selecting that module. In order to do so, you can click the module name. For example, let’s select the figures module by clicking the plus sign next to that module name: 
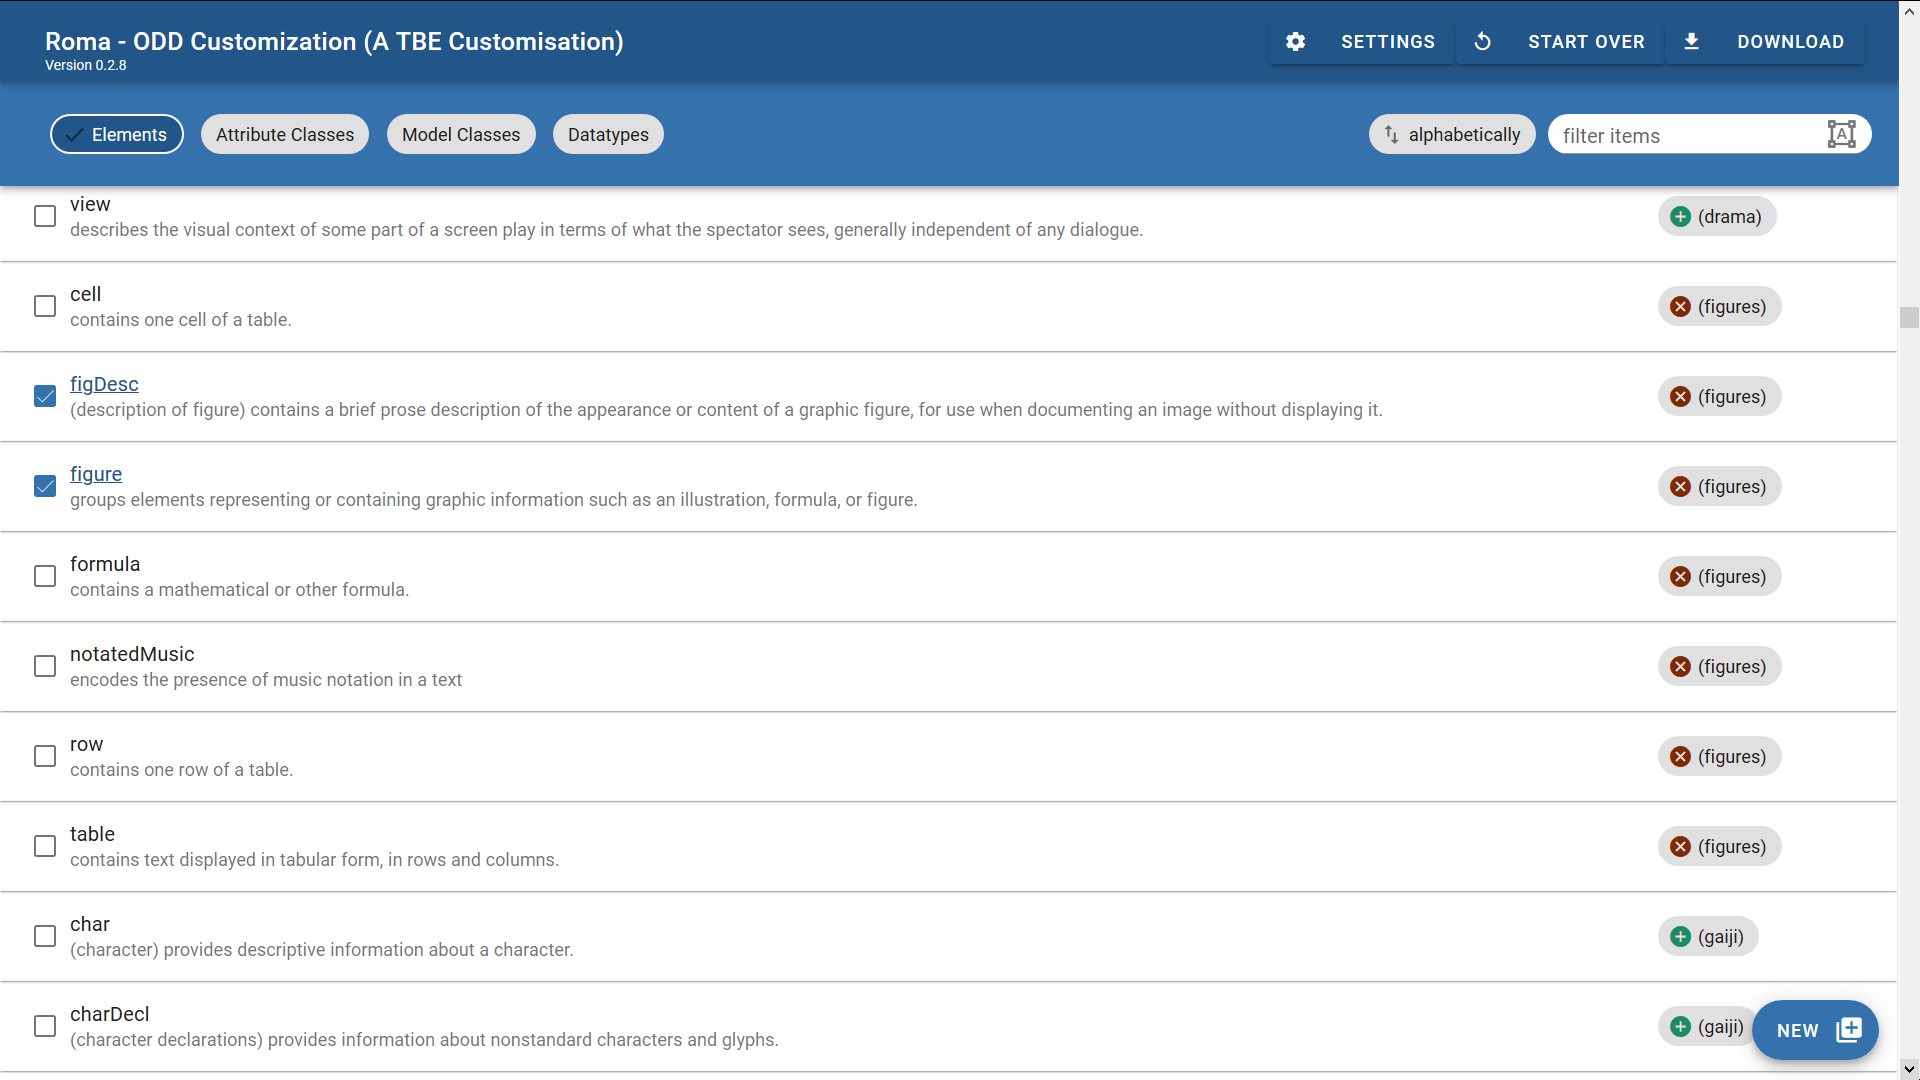
If we order the elements by module (by clicking the “by module” button at the top right of the Roma screen) and scroll down to the figures module, you’ll see that all of its elements now have been included in your customisation. This includes some elements we didn’t identify in the document analysis for our document; if we are absolutely certain we only have to encode images, but no tables, formulas, or music notations, these elements can quickly be deselected by unticking the element name in the left-hand column:
Did you notice how the <graphic> element is part of the core module, and not of figures? If you want to include the images themselves in your transcription of Alice, you’ll have to include the <graphic> element as well. Hint: you can quickly look up an element by entering its name in the search box at the top right of the Roma screen:
That’s all there is to including and excluding existing TEI elements with Roma! You can also remove an entire module at once, with the caveat that this will remove all its members (and possible modifications you’ve made to them) from your customisation. Since you might run the risk of losing work here, Roma issues a warning in order to prevent unwanted mistakes:
Now, save your customisation as an ODD file (click the “Download” > “Customization as ODD” button at the top right of the Roma screen). Its <schemaSpec> element will be updated to:
Note
Because all further changes to the ODD file in this TBE tutorial module will affect only its <schemaSpec> part, the example fragments will focus on this element.When we generate a TEI schema from this customisation (via the “Download” button at the top right of the Roma screen), this allows us to validate a transcription of a typical page of the document (the third image from the Alice scans above) as follows:
So far for selecting modules and elements. The obvious counterpart, adding new elements, will be dealt with later in this tutorial (see section 6). First we will focus on attributes.
Summary
Modules can be selected simply by referencing them with a <moduleRef> element, whose @key attribute must be used to identify the desired TEI module. By default, all elements of a module are selected for inclusion in the schema. If an @include attribute is present, only those elements that are being enumerated will be included in the customisation, and all others won’t. If you want to exclude only a couple of elements from a module, but include all others, this can conveniently be done by enumerating the ones you don’t want in an @except attribute. You can’t use both at the same time.5.2. Changing Attributes #
5.2.1. Changing Individual Attributes #
As shown in the previous encoding snippet, the <name> element definition (from the core module) comes with a @type attribute. By providing a keyword for this attribute, we can specify what type of name is being identified with the <name> element. By default, the @type attribute can contain any single keyword from an unspecified list: anything goes as long as it conforms to some syntactic rules, specified in the teidata.enumerated datatype (basically, only a few punctuation marks are allowed, and it should start with a letter). Apart from that, there is no limit on possible values for the @type attribute. However, to improve consistency in our Alice encoding project, we would like to trim down these possibilities for the @type attribute of <name>. We’re only interested in the categories "person", "place", and "animal". This can be done in Roma, by navigating to the definition of the <name> element. In order to do so:
- load the TBEcustom customisation again in Roma if you haven’t done so already, and click the “Customize ODD” button,
- move to the “Elements” tab and scroll down to the definition of <name>.
In order to edit its attributes, just click the “name” element in the list (make sure it is selected, before you can click it):
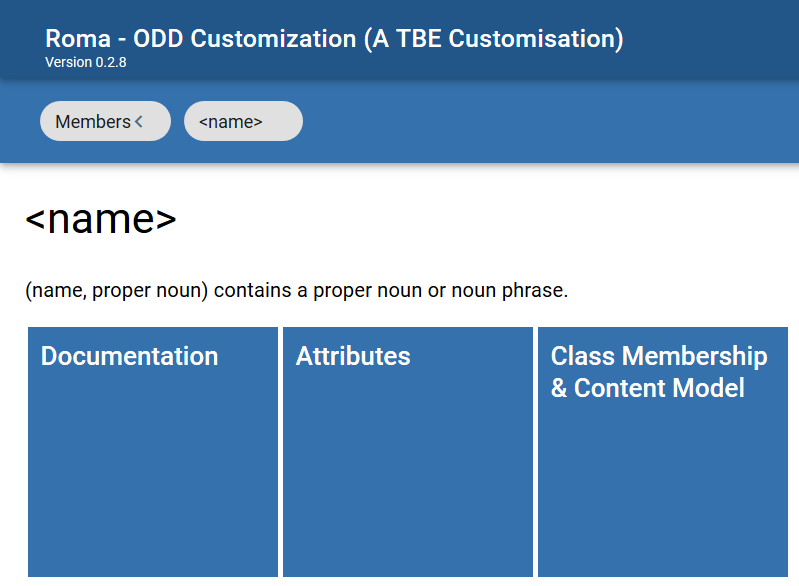
Clicking an element in Roma opens an “edit” screen, where some aspects can be changed:
- “Documentation” here you can change the description of an element
- “Attributes” here you can change the attributes of an element
- “Class Membership & Content Model” here you can change the classes an element belongs to, and the elements or element classes it can contain
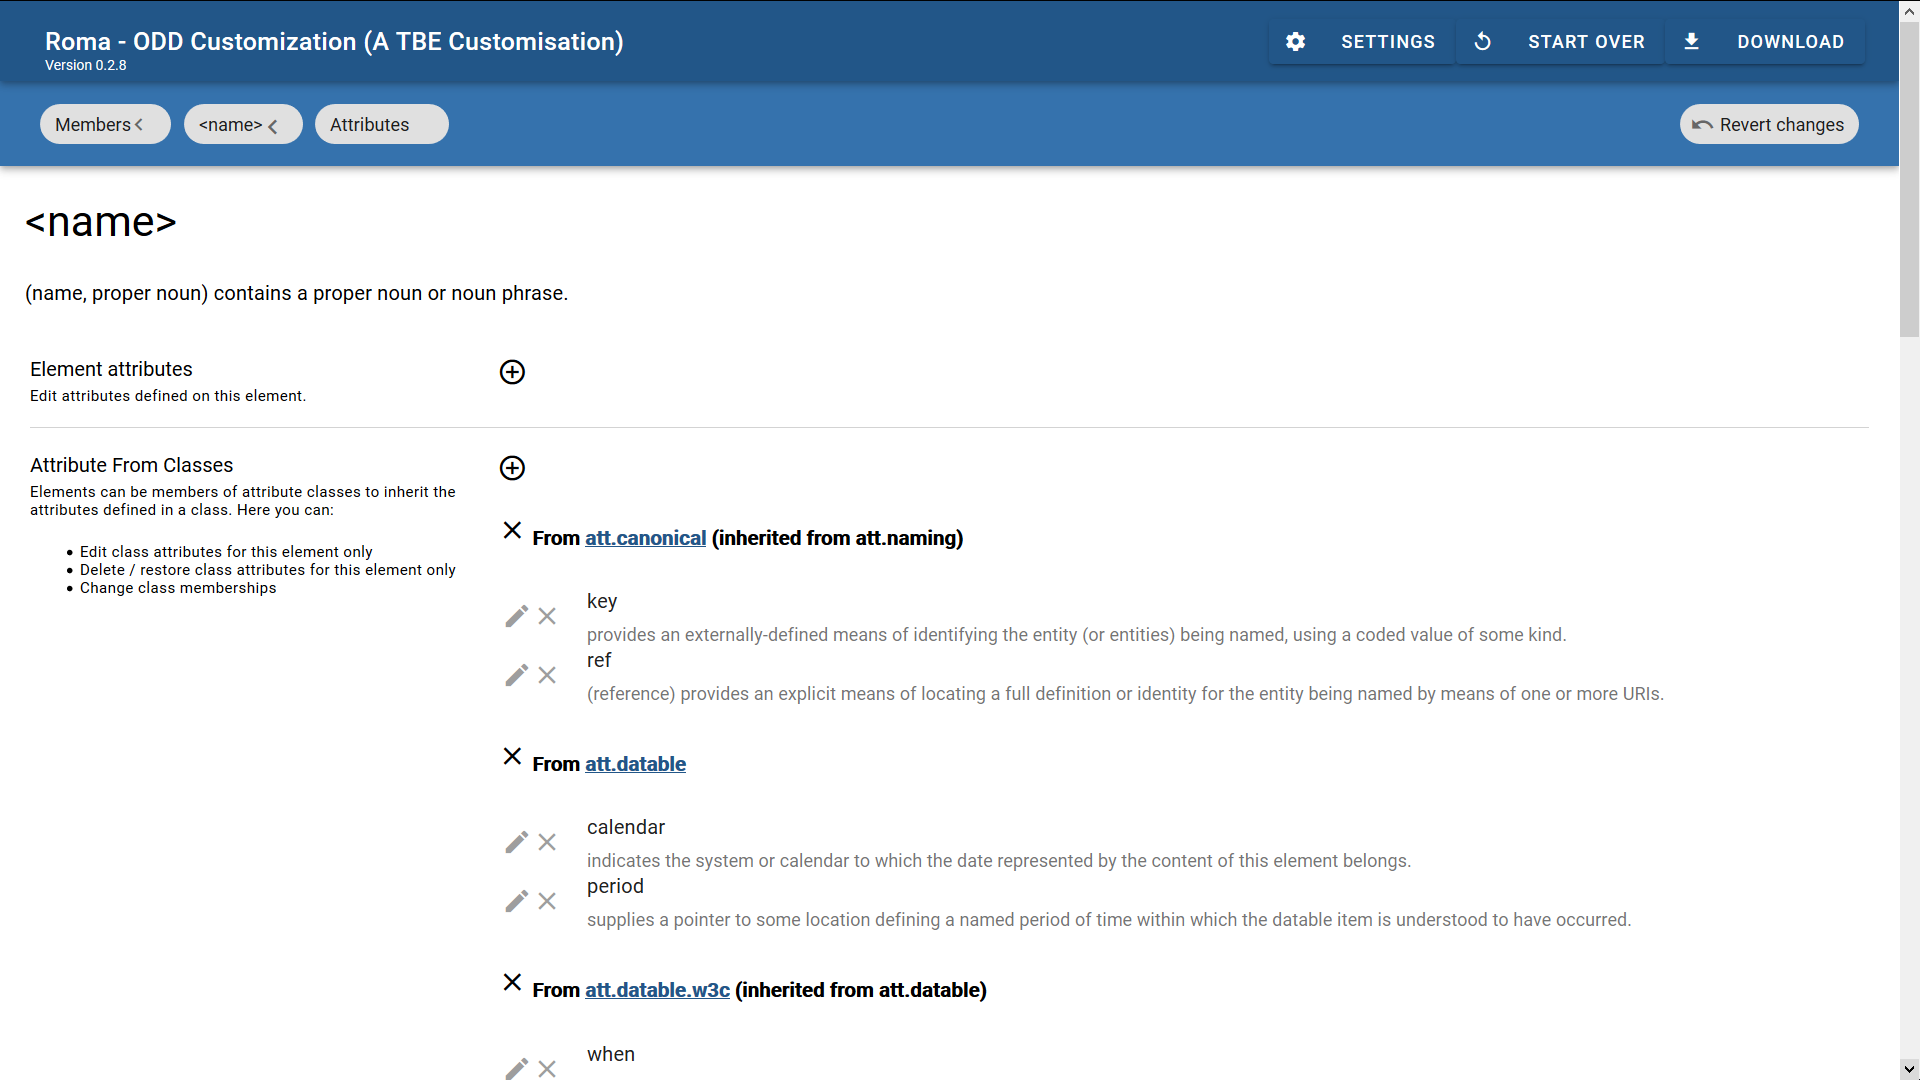
Since we want to restrict the values allowed for the @type attribute of <name>, hit the “Attributes” button. This produces an overview of all attributes defined for the <name> element, organised per attribute class from which they are inherited:
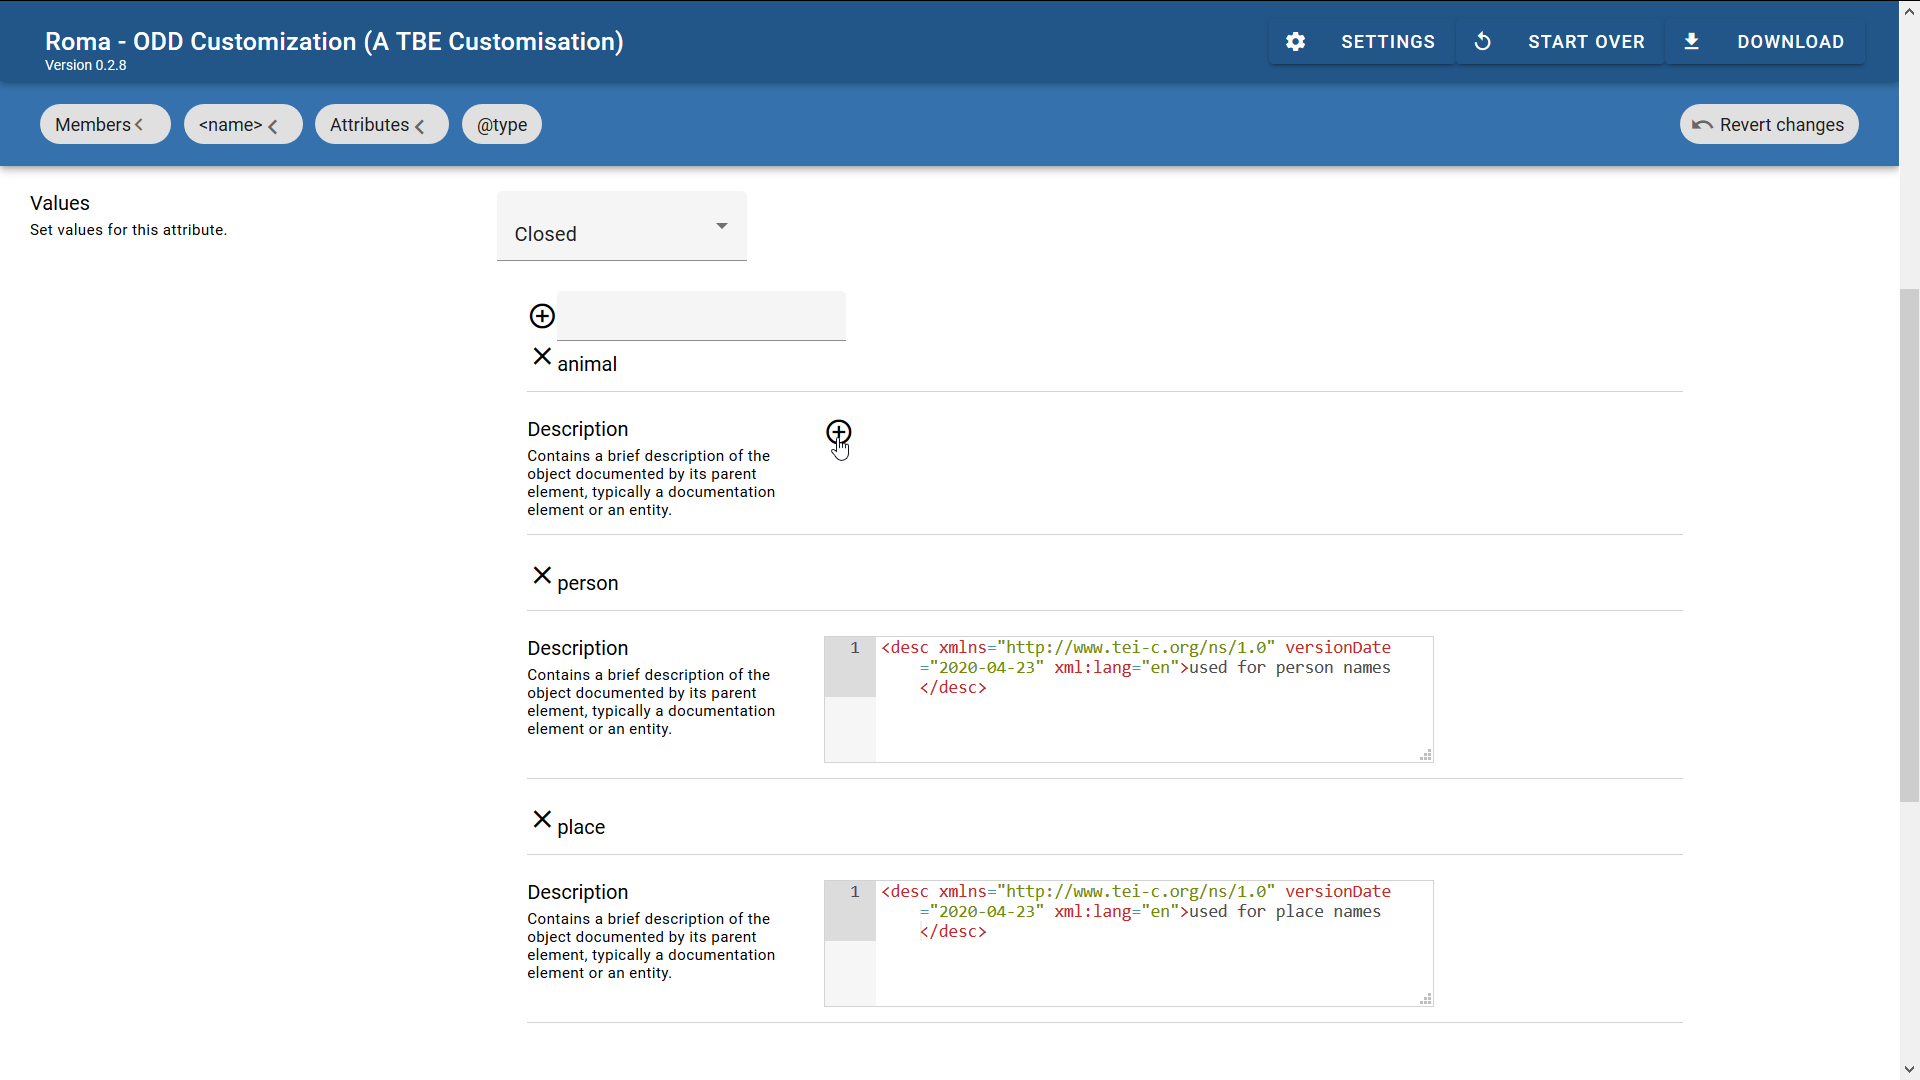
Scroll down to the bottom, where you will find the @type attribute listed (in the att.typed attribute class). Left of each attribute name, you’ll find a pencil icon for editing the attribute, and a cross icon for removing the attribute. Since we want to restrict the values for the @type attribute, just click the pencil icon next to it. This will show the current definition of that attribute. There you can determine whether the attribute should be mandatory or optional, what the datatype of its value(s) should be, and what kind of values it allows. The “Values” section is where we can restrict the possible values for the @type attribute for names to a closed list. In order to do so:
- Click the drop-down box in the “Values” field, and change it to “Closed.”
- For each value we want to allow for this attribute ("place", "person", and "animal"), enter the value in the text box below, and click the “+” sign next to it.
- For each new value, a description can be provided by clicking the “+” sign next to “Description.”
The changes are being recorded immediately in Roma. Clicking the “Attributes” button in the top menu of the Roma screen brings us back to the attributes list for the <name> element. Now, let’s remove some attributes we don’t need in our encoding project. With Roma, it’s possible to remove entire attribute classes at once by clicking the “X” sign next to the attribute class names in the list. Let’s do so for att.datable, att.editLike, att.global.responsibility, att.global.source, att.naming, and att.personal. Also, the @subtype and @nymRef attributes can go, just click the “X” sign next to the attribute name.
If we save the customisation at this stage (by clicking the “Download” > “Customization as ODD” button), the ODD file gets updated to:
Notice how a new element is introduced: <elementSpec>. In a schema specification, this is where elements are being defined. It has a mandatory @ident attribute, which names the element. In this case, the "name" value tells us that this element specification defines a <name> element. Although this could be specified further by adding a @module attribute with value "core", this is not mandatory, since element names are unique across all TEI modules.
Defining a TEI element that already exists might seem a bit weird at first sight. Notice, however, the @change attribute with the value "change", which is expressing that this existing TEI element is being changed in this customisation. This is an important mechanism: via the @mode attribute, ODD lets you specify a number of actions on the declaration of elements and attributes (and many of their components):
- "add"
- a new declaration is added to the current definitions
- "delete"
- an existing declaration is removed
- "change"
- an existing declaration is changed partly: only the customised parts are changed; all other parts are copied from their TEI definition
- "replace"
- an existing declaration is changed completely: only the customised parts are copied; all existing TEI definitions are ignored
In our ODD file, the <elementSpec ident="name" mode="change"> element is telling that the existing declaration of <name> (in the core module) should be copied, except for the components that are overridden in this customisation. In this case, there are both class-related changes, that are grouped in a <classes> element, and attribute-related changes, that are grouped in an <attList> element. The <classes> element groups class membership declarations in <memberOf> elements. In this case, three class memberships are deleted: each <memberOf> element refers to the class with the value of a @key attribute, and next states that this membership should be removed, by the "delete" value for the @mode attribute. It’s interesting to notice that, even though we removed the att.canonical class in Roma, this is not reflected in a separate <memberOf key="att.canonical" mode="delete/> element in the ODD file. This is not strictly needed, since att.canonical is a member of att.personal, so removal of the latter superclass automatically implies that the subclass(es) are removed as well.
Apart from class deletions, the <elementSpec> element with the definition of the customised <name> element groups attribute declaration in an <attList> element. Each attribute is declared in an <attDef> element. Here, too, the attribute is identified with an @ident attribute, and the customisation action is given in @mode. Four attributes are deleted: @subtype, @nymRef, @cert and @resp (from the att.global.responsibility attribute class), and @source (from the att.global.source attribute class). It’s interesting to notice that Roma doesn’t just remove these classes via a <memberOf> element, as with the other attribute classes we had deleted, but instead removes their attributes individually. While both ways of removing attributes in ODD are equivalent, Roma probably opts to remove “standalone” classes as such, while members of “inherited” classes are removed individually.
The definition for the @type attribute, has the value "change" for its @mode attribute, meaning that its contents should override the existing definitions. Since we restricted the list of possible values to a closed vocabulary, a <valList> re-defines the value list of this @type attribute. Its @type attribute with value "closed", indicates that the attribute value list is a closed list. In order to indicate that only the parts defined in our customisation should be changed, a @mode="change" attribute is given on <valList>. The different values of this closed list are defined in a series of <valItem> elements, with the value of the attribute given in an <ident> attribute (in this case: "place", "person", and "animal", respectively). Inside <valItem>, the description of the attribute value is given in a <desc> element. Notice that, since these attribute values are new, the @mode attribute on each <valItem> element has the value "add", to tell the ODD processor that they should be added to the existing definition of the @type attribute. All other parts of the existing TEI definition of the @type attribute are being copied when transforming this ODD file to a schema or documentation.
Note
Notice, however, that a full attribute definition consists of more fields, like a description, declarations of datatype and occurrence indicators. These are discussed later in this module (section 6.2).Summary
Elements are defined in an ODD file with the <elementSpec> element. The element must be identified in an @ident attribute, and the processing mode should be stated in a @mode attribute. Inside an element declaration, entire attribute classes can be removed by removing their membership of an attribute class. This is done inside a <classes> section, where each class membership is declared in a <memberOf> element. The value "delete" for the @mode attribute indicates that a class membership should be removed. Declarations for individual attributes are grouped in an <attList> element inside <elementSpec>. Each single attribute is given its own definition inside an <attDef> element. This element, too, carries the @ident and @mode attributes, respectively for identifying the attribute, and specifying the status of the declaration. To delete attributes, indicating the @mode as "delete" suffices. Changing attributes requires a "change" mode. Value lists for an attribute can be defined in a <valList> element, whose @type attribute indicates whether the value list is open-ended ("open") or closed ("closed"). The @mode attribute can specify whether a <valList> declaration merely contains some changes to the existing TEI declaration ("change"), or replaces the original definition ("replace"). A value list declares each separate value for an attribute in a <valItem> element, with the value given in an @ident attribute. The attribute value can be described in a <desc> element.5.2.2. Changing Attribute Classes #
As mentioned before, TEI modules group attribute definitions into attribute classes. This facilitates the definition of elements that share the same attributes, by declaring them as members of an attribute class. For example, all TEI elements are declared members of the att.global attribute class, which defines the global attributes @xml:id, @n, @xml:lang, @rend, @rendition, and @xml:base.
As it happens, the @nymRef attribute we have deleted from the definition of the <name> element in the previous section, is defined in such an attribute class, namely att.naming, of which <name> is declared a member. This information may seem disparate, but is actually easy to find in Roma. Actually, we’ve been there before:
- load the TBEcustom customisation again in Roma if you haven’t done so already, and click the “Customize ODD” button,
- move to the “Elements” tab and scroll down to the definition of <name>.
Remember how the attributes for <name> were grouped per attribute class? Those attribute class names are clickable in Roma. One way of accessing the att.naming attribute class definition in Roma, is by clicking the link with the label att.naming in the attributes list:
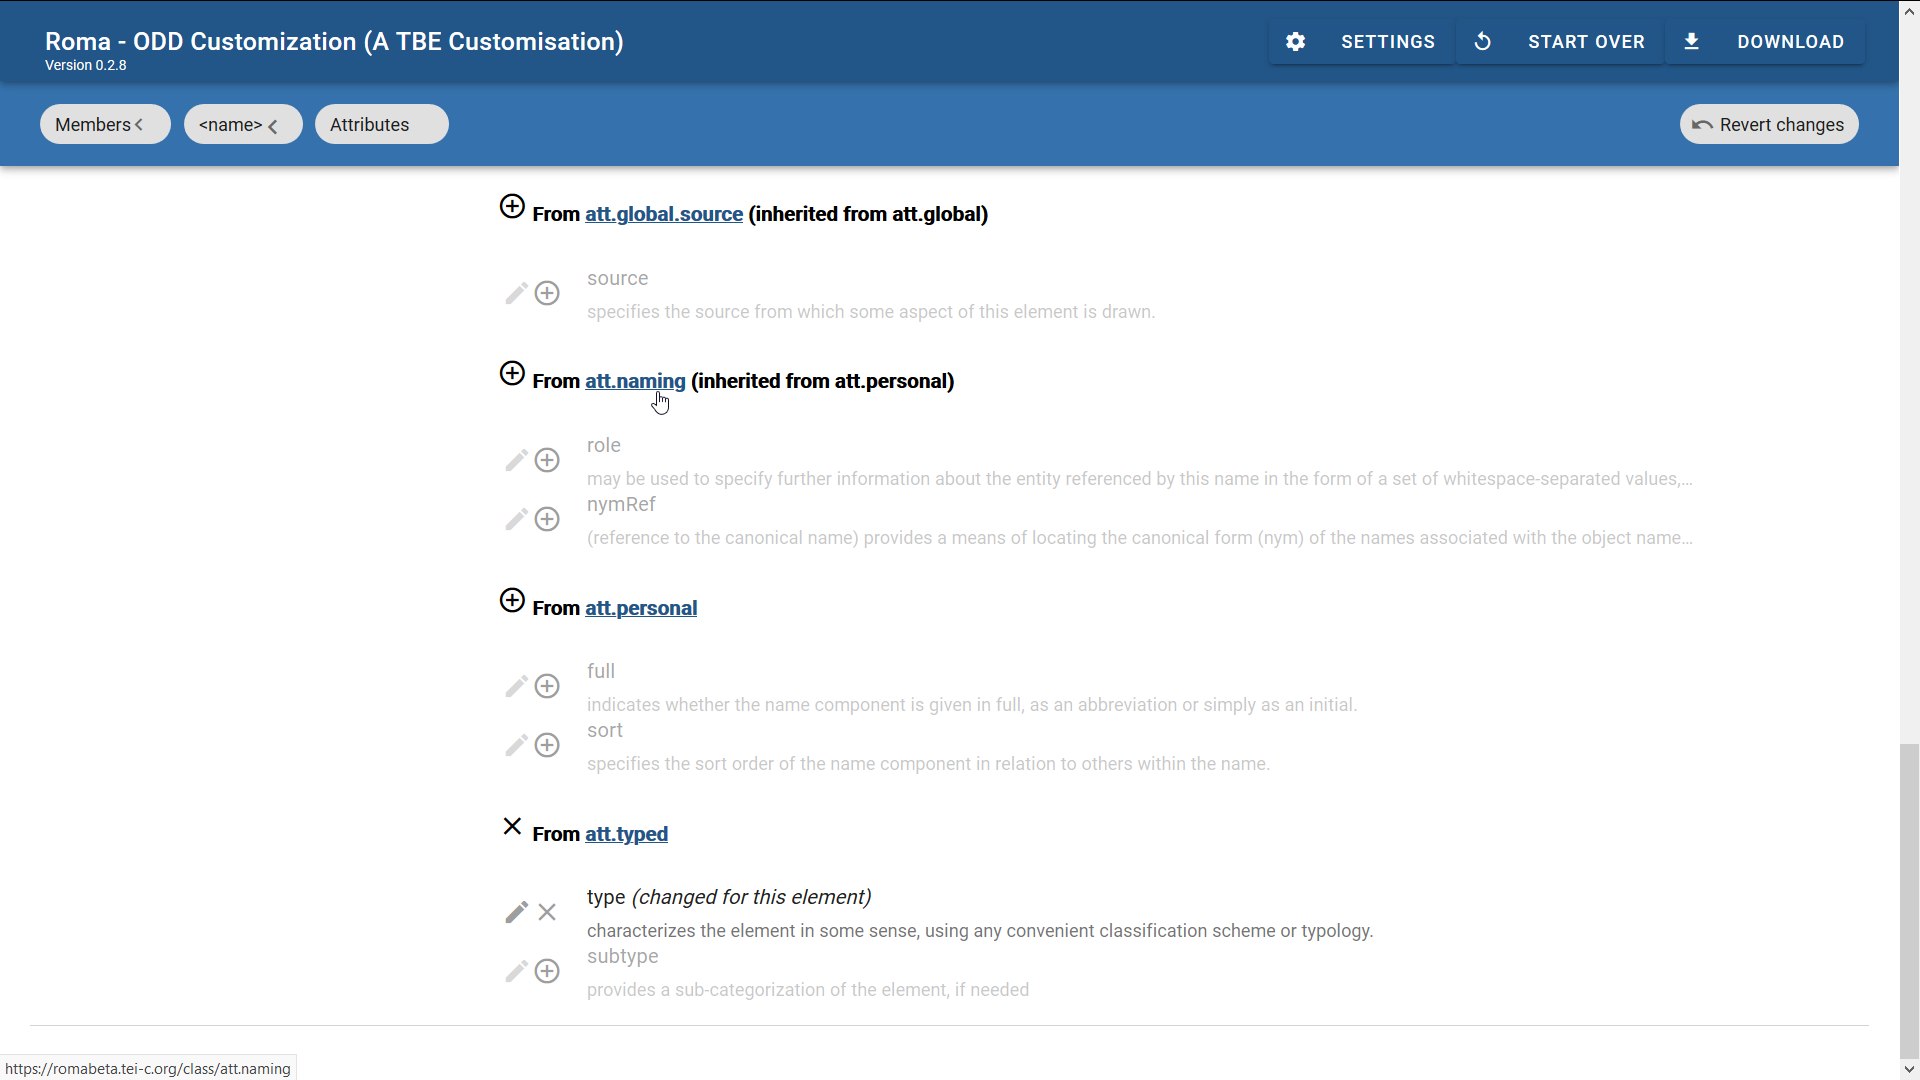
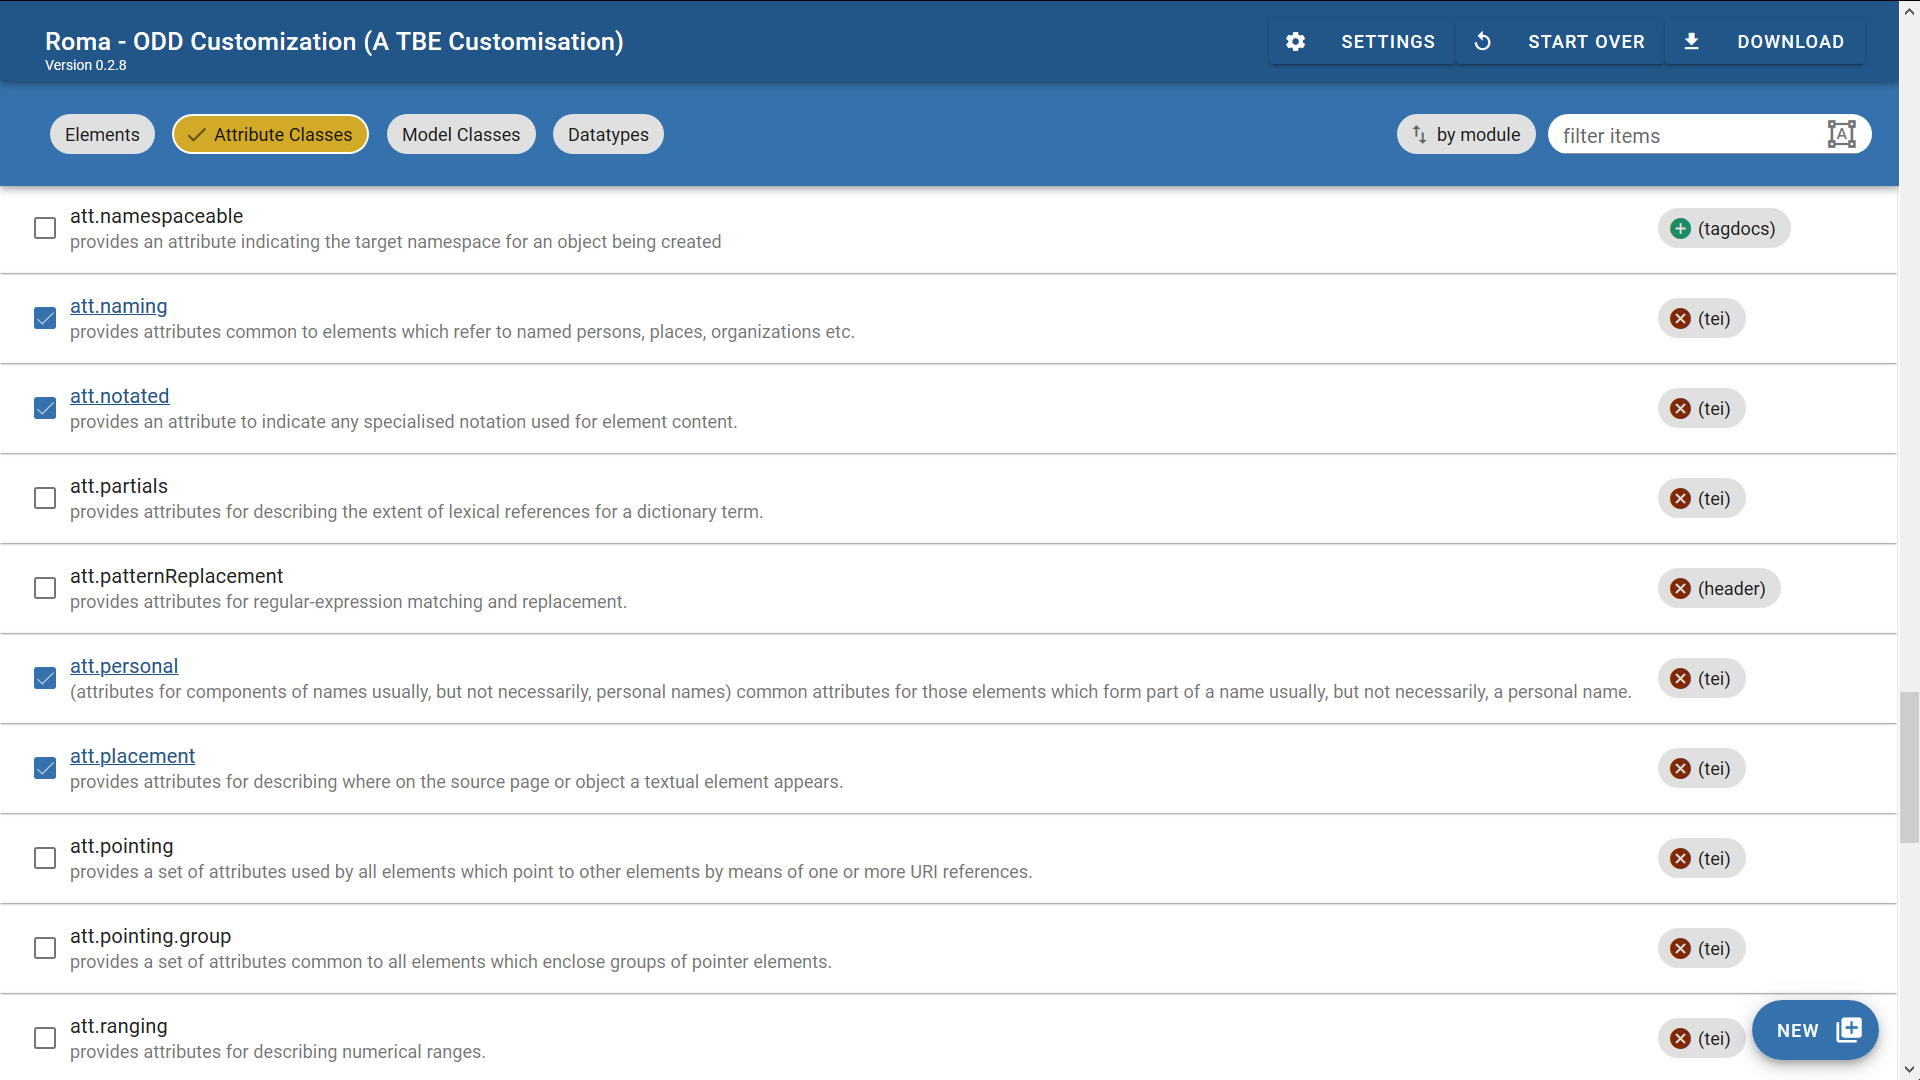
Another way of navigating to the attribute classes, is by selecting the “Attribute Classes” tab at the top left of the Roma screen. As with the “Elements” tab, you’ll get a list of all attribute classes, with an indication of those that have been included in the current customisation, and an indication of the TEI module that defines them.
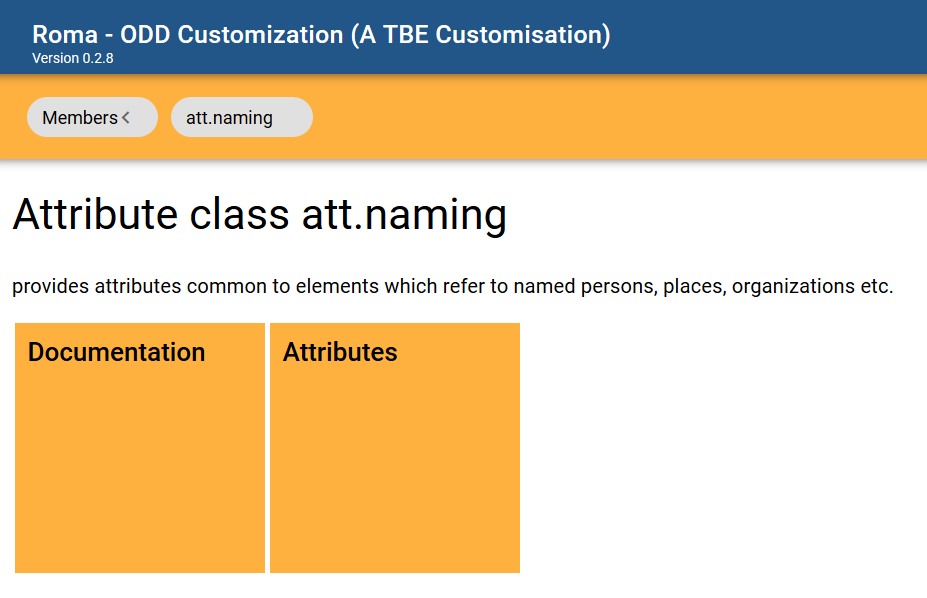
Clicking the link with the label att.naming attribute class here, will take you to the definition of this attribute class:
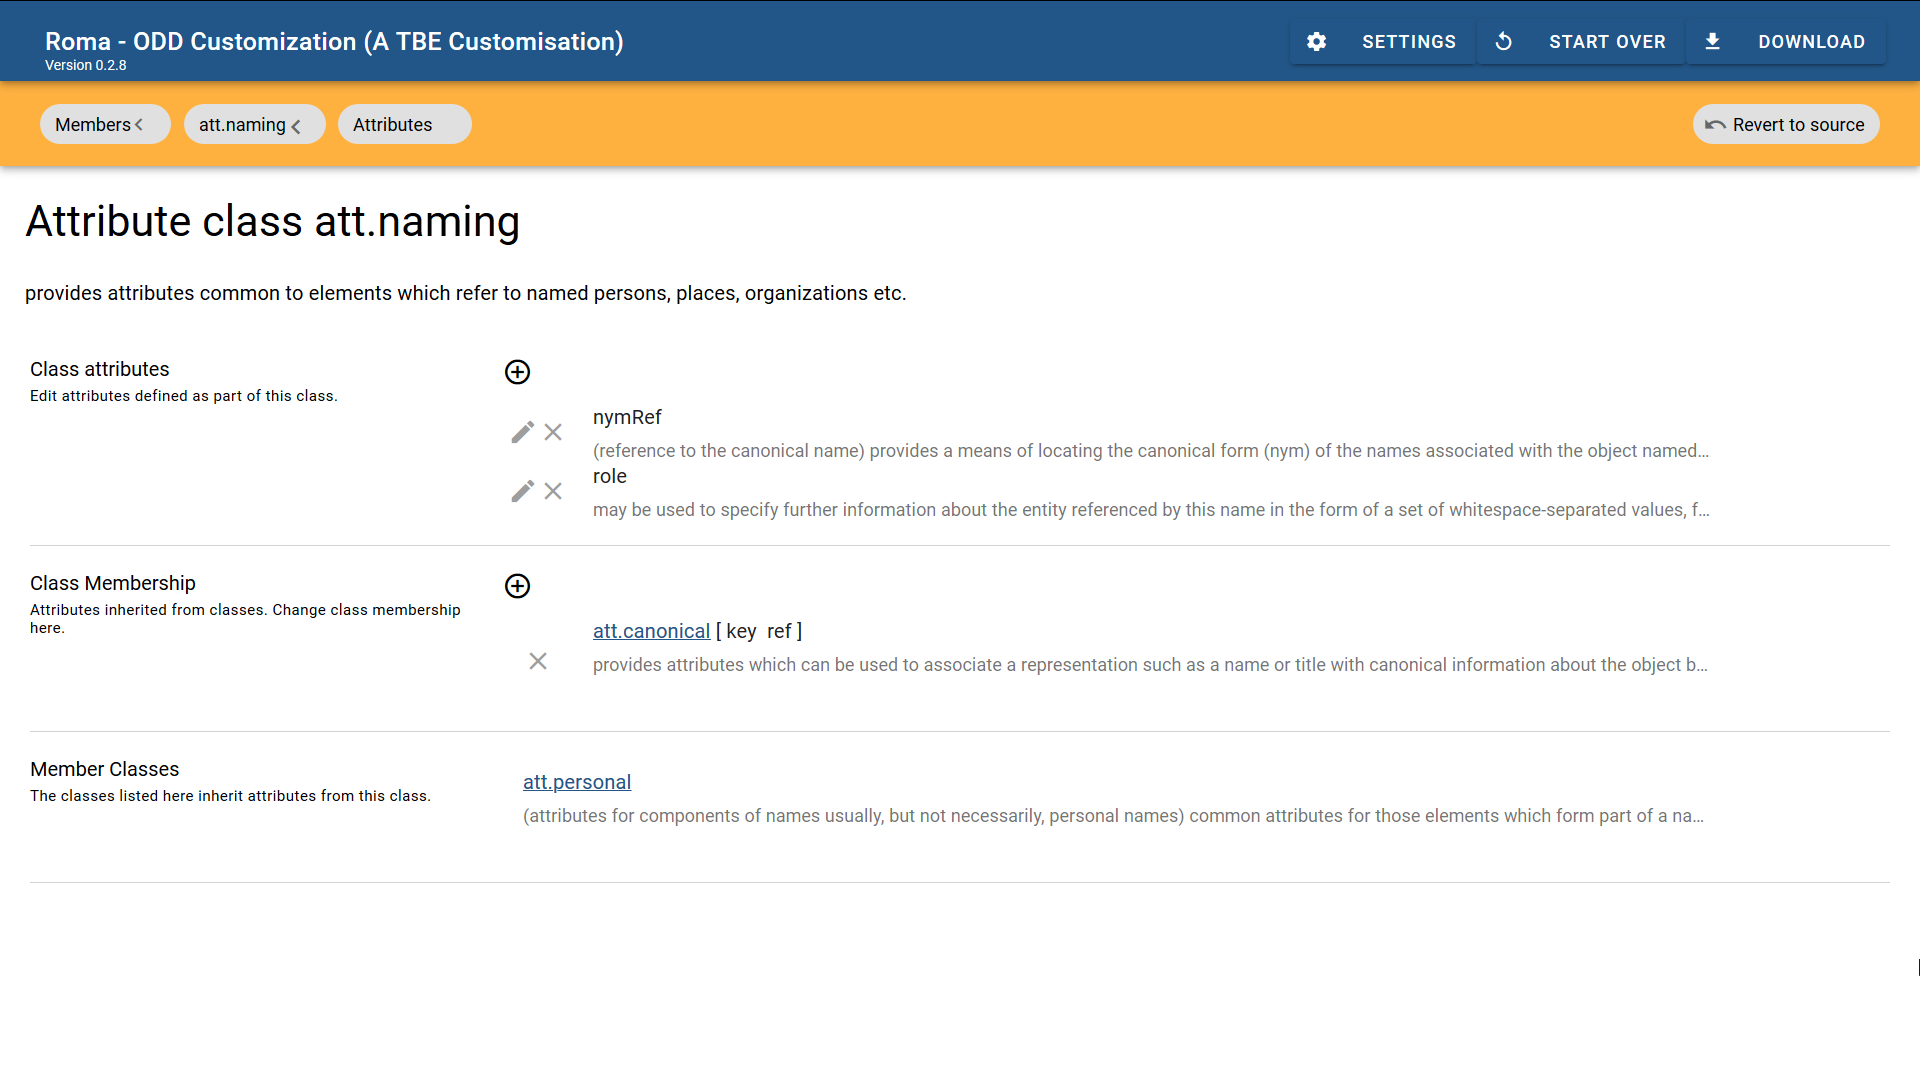
The “Attributes” button will take us to the definition of the attributes inside this class:
The attribute class contains a number of sections: “Class Attributes” define the attributes of this class, in this case @nymRef and @role. In “Class Membership,” a superclass can be given; here, the att.naming attribute class is declared as a member of the att.canonical attribute class. This means that elements declaring themselves as member of (the subclass) att.naming, will also inherit the attributes defined in (the superclass) att.canonical, namely @key and @ref. Finally, the section “Member Classes” names attribute classes that are defined as subclass of att.naming, in this case att.personal.
Now, instead of removing the @nymRef attribute only from the <name> element as we did in the previous section, we could as well delete it globally from all elements that are member of the att.naming attribute class. This can be done simply by clicking the “X” sign next to the @nymRef attribute name.
If we save the customisation again (by clicking the “Download” > “Customization as ODD” button at the top right of the Roma screen), this produces following ODD file:
Now, the <schemaSpec> element in our customisation ODD file contains another element, besides <elementSpec>: <classSpec>. This is where classes are being declared. As with element and attribute definitions, the name of the class is given in an @ident attribute, and a @mode attribute indicates the processing mode. There is an extra, mandatory, attribute, though: @type, which indicates what kind of class is being defined. Possible values are:
- "atts"
- for the definition of an attribute class, which defines a number of common attributes
- "model"
- for the definition of a model class, which groups elements that can occur in the same context in a TEI document
The content of this class specification looks familiar: an <attList> element groups all attribute declarations defined by the (attribute) class. Since the att.naming class is being processed in "change" mode, it suffices to just redefine the @nymRef attribute of this class: all other attributes of the class are being copied unmodified in our customisation. Hence, all it takes to remove @nymRef from the att.naming class, is an <attDef> element with @ident="nymRef", and @mode="delete".
Actually, the deletion of the @nymRef attribute from the att.naming attribute class obsoletes our earlier deletion of the same attribute from the <name> attribute. However, it does no harm to have this deletion on both <elementSpec> and <classSpec> levels (they don’t contradict each other). The effect of this customisation can be seen by generating a TEI schema (via one of the schema output formats in the “Download” button at the top right of the Roma screen): this will only validate documents whose name-like elements don’t have a @nymRef attribute.


